Drywall holes can be an eyesore, but fixing them doesn’t have to be a challenge. Whether it’s from a doorknob, accidental bump, or a minor mishap, patching up drywall holes is a task you can handle with a bit of guidance. El Paso homeowners often face unique challenges due to the local climate, but choosing the right techniques and materials can make a huge difference.
Knowing what tools and materials to use is the first step towards a successful repair. Proper preparation can save you time and ensure your repairs blend seamlessly with the rest of the wall. Different hole sizes require different techniques, so it’s important to understand what method works best for each type of damage.
So, we’ll walk you through the best ways to patch up drywall holes, from small dents to large repairs. By following these steps, you can restore your walls to their original condition, making your home look as good as new. No matter your experience level, these tips will help you achieve professional-looking results without a hassle.
Essential Tools and Materials for Patching Drywall Holes
Before you start patching drywall holes, make sure you have the right tools. Here’s a handy checklist to get you prepared:
1. Utility knife: For cutting and trimming the drywall.
2. Drywall saw: Handy for cutting out larger damaged sections.
3. Spackle or joint compound: To fill in the holes.
4. Putty knife: For applying spackle or joint compound.
5. Sanding sponge or sandpaper: To smooth out the patched area.
6. Joint tape: To cover seams if you’re repairing larger holes.
7. Screwdriver or drill: To secure patches or new drywall sections.
8. Drywall screws: For fixing larger patches.
7. Pencil and tape measure: For accurate measurements.
8. Dust mask: To protect yourself when sanding.
Having these tools ready will help you complete the job efficiently and achieve a professional finish.
Recommended Materials for Different Hole Sizes
The types of materials you need will depend on the size of the hole you’re fixing:
- Small Holes (up to 1/2 inch): For tiny holes, a small tub of spackle and a putty knife should do the trick. These holes are often from nails or minor dings.
- Medium Holes (1/2 inch to 6 inches): Use a drywall patch kit that includes a mesh patch, joint compound, and a sanding sponge. These are good for holes caused by accidents or doorknobs.
- Large Holes (6 inches and above): You’ll need a new piece of drywall, joint tape, screws, and joint compound. This type of damage usually happens due to heavy impacts or structural changes.
Choosing the right materials will ensure that your repairs are durable and blend seamlessly with the rest of the wall.
Quick Fixes for Small Holes and Dents
1. Using Spackle to Fill Small Holes
For small holes and dents, spackle is your best friend. Start by cleaning around the hole to remove any loose debris or dust. Apply a small amount of spackle onto the putty knife and spread it over the hole. Make sure to fill the hole completely, and then smooth out the excess spackle to make it level with the wall.
2. Easy Application Techniques
When applying spackle, less is more. It’s easier to add more spackle if needed, but removing excess can be messy. Press the spackle into the hole and spread it thinly over the area. Feather the edges by pressing down harder on the edges of your putty knife as you move away from the hole. This helps blend the repair with the surrounding wall, making it less noticeable once dry.
3. Sanding and Finishing the Patched Area
After the spackle dries (check the packaging for drying times), it’s time to sand. Use a sanding sponge or fine-grit sandpaper to smooth the patched area. Sand gently in circular motions to avoid removing too much spackle and creating a depression. Wipe away the dust with a damp cloth. Once smooth, the area is ready for primer and paint, ensuring the repair blends seamlessly with the rest of the wall.
By following these simple steps, you can quickly and easily fix small holes and dents, restoring your walls to their original condition.
Effective Methods for Repairing Medium-Sized Holes
1. Using a Patch Kit for Medium Holes
Medium-sized holes, like those caused by doorknobs or minor accidents, require a bit more effort to repair. A patch kit is a useful solution. These kits usually come with a self-adhesive mesh patch, joint compound, and a putty knife. Begin by cleaning the damaged area to remove any loose debris. Then, apply the mesh patch over the hole. Ensure it’s centered and firmly attached.
2. Securing and Blending the Patch
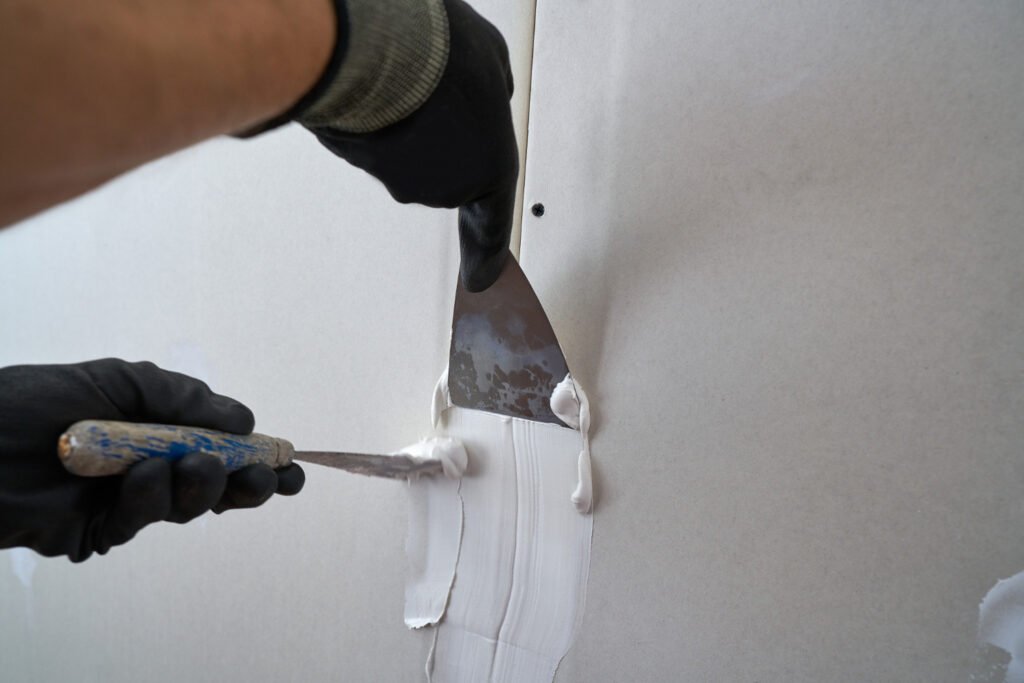
Next, use a putty knife to spread a layer of joint compound over the patch, covering it completely. Smooth out the compound, feathering the edges to blend it with the surrounding wall. It may take 2-3 layers to fully cover the patch, but make sure to let each layer dry before applying the next. This helps to avoid bumps and ensures a smooth finish.
3. Tips for a Seamless Finish
Once the final layer of joint compound is dry, lightly sand the area with fine-grit sandpaper until it’s smooth. Wipe away any dust with a damp cloth. If necessary, apply a thin coat of primer before painting to ensure color consistency. This step helps the patched area match the rest of the wall, making the repair virtually invisible.
Best Practices for Large Drywall Repairs
1. Cutting Out the Damaged Area
For large holes, you’ll need to replace the damaged section of drywall. Start by using a drywall saw to cut a square or rectangular piece around the hole. Make sure the edges are clean and straight. Measure the opening and cut a new piece of drywall to fit the hole. This replacement piece should fit snugly within the cutout area.
2. Installing a New Piece of Drywall
Place the new drywall piece into the hole and secure it using drywall screws. Drive the screws into the studs behind the drywall to ensure a tight fit. Space the screws about 8-12 inches apart along the edges of the new piece. This keeps the new drywall secure and flush with the existing wall.
3. Taping, Mudding, and Sanding for a Smooth Surface
To hide the seams between the new and old drywall, apply joint tape over the edges. Then, use a putty knife to spread joint compound over the tape, ensuring it covers the seams completely. Feather the compound’s edges for a smooth transition.
Let each layer of compound dry before applying the next. Once you’ve built up enough layers, sand the area smooth. Finally, wipe away the dust and apply primer before painting
Repairing Drywall Holes Made Easy
Repairing drywall holes can seem daunting, but with the right tools, materials, and techniques, it’s doable for anyone. From small dents to large holes, knowing how to assess and fix each type of damage can keep your walls looking flawless. These repairs also add value to your home and prevent further issues down the line.
Whether you’re patching up minor holes or tackling larger repairs, following these steps will ensure a professional-looking finish. Remember, preparation and patience are key. Take your time to do it right, and you’ll be pleased with the results.
Need more help with your drywall repairs in El Paso? Contact Premier Home Updates for expert advice and professional services. We’re here to help you achieve the perfect look for your El Paso home. Call us today to get started!


